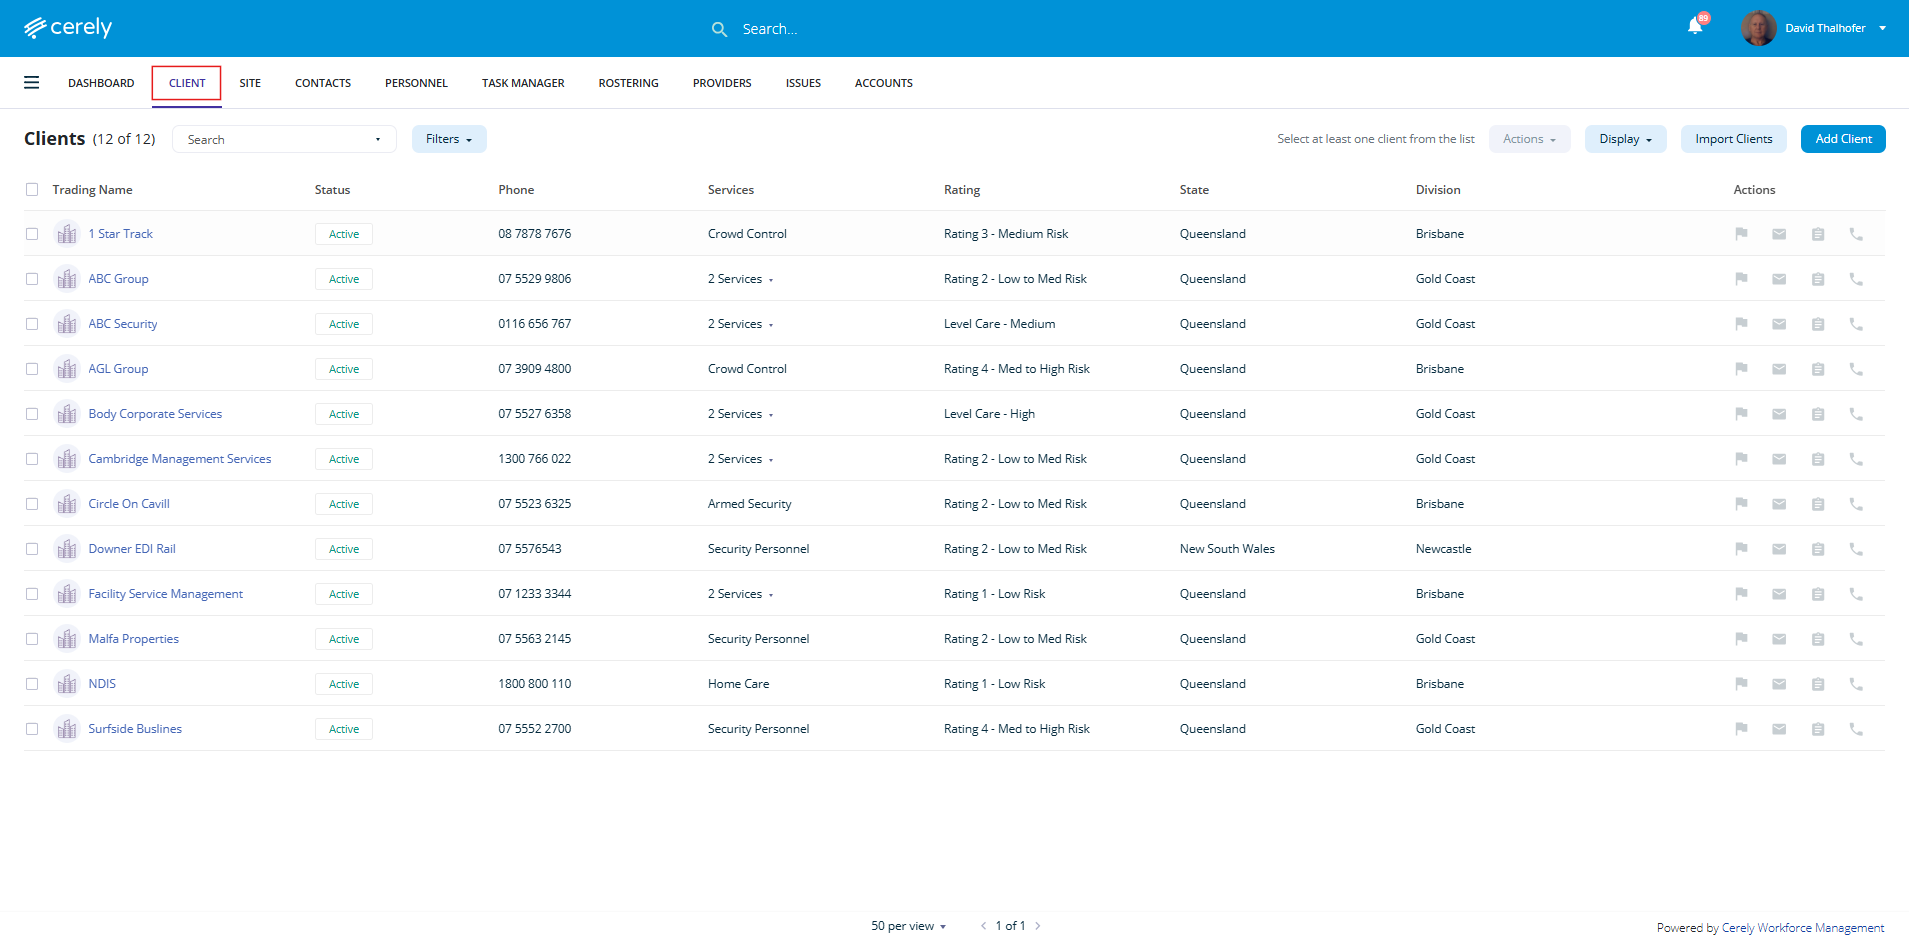
1. From the main menu on the Cerely dashboard, click on the Client tab
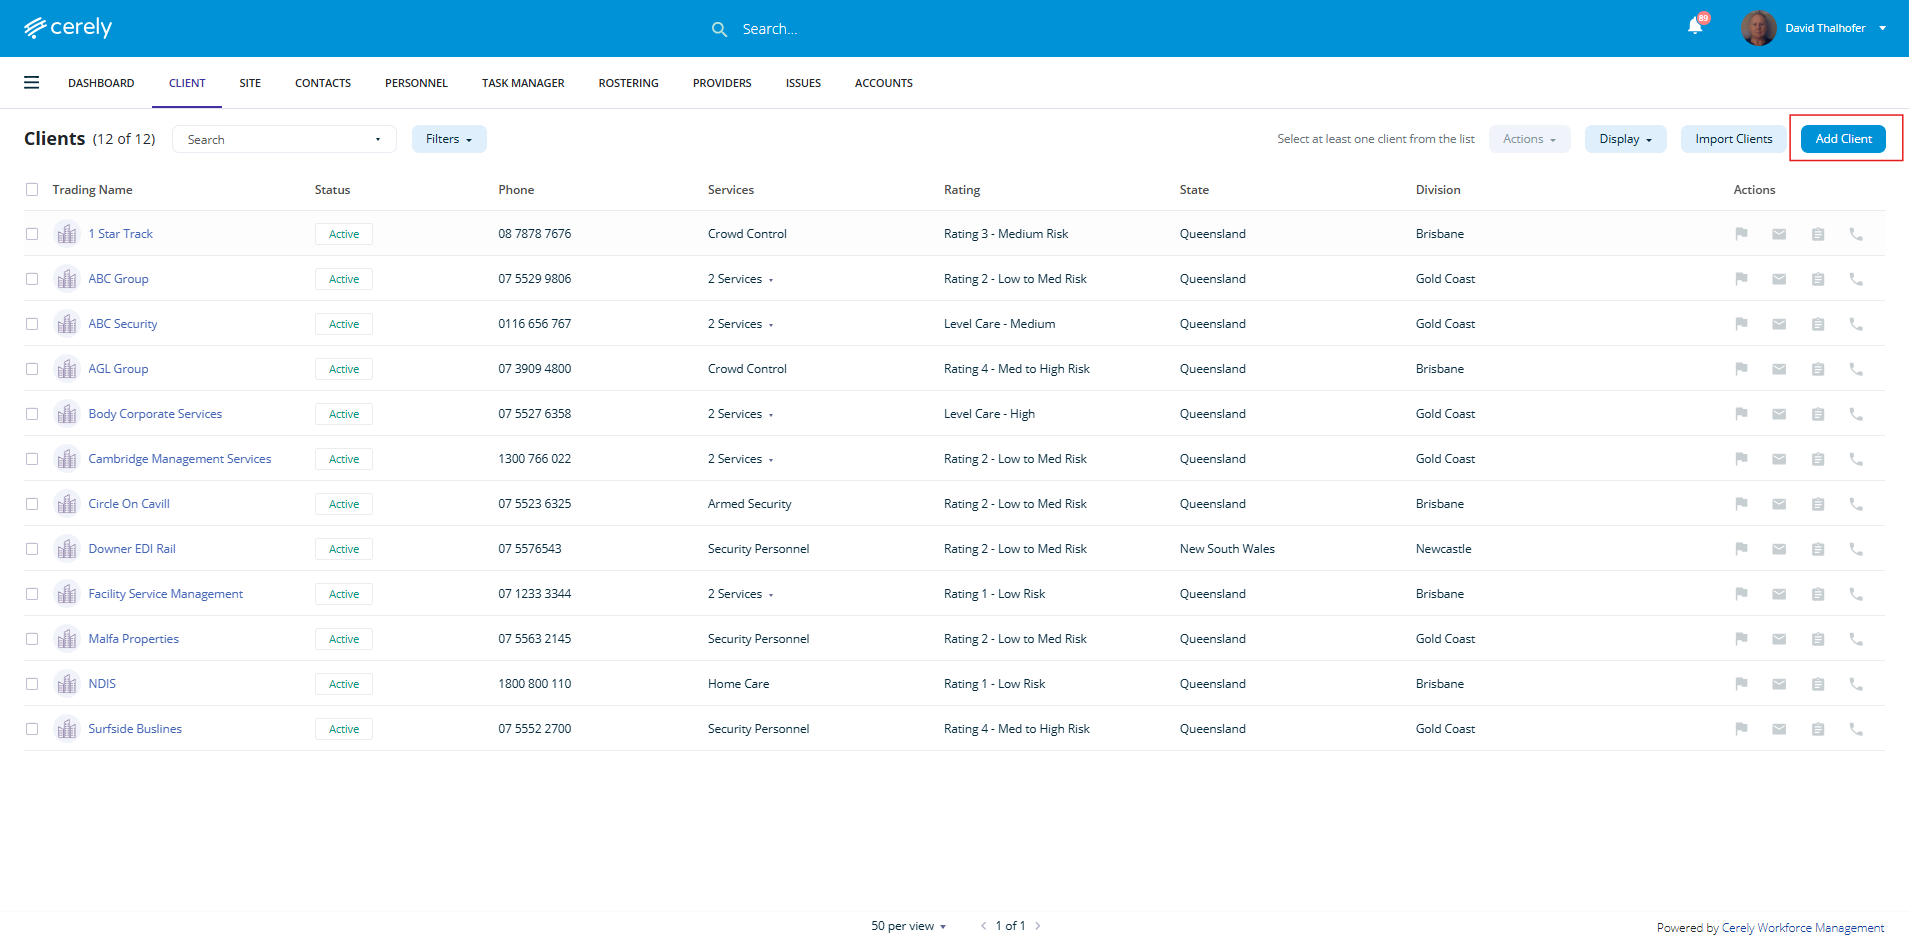
2. Click on the add client button in the right hand side menu
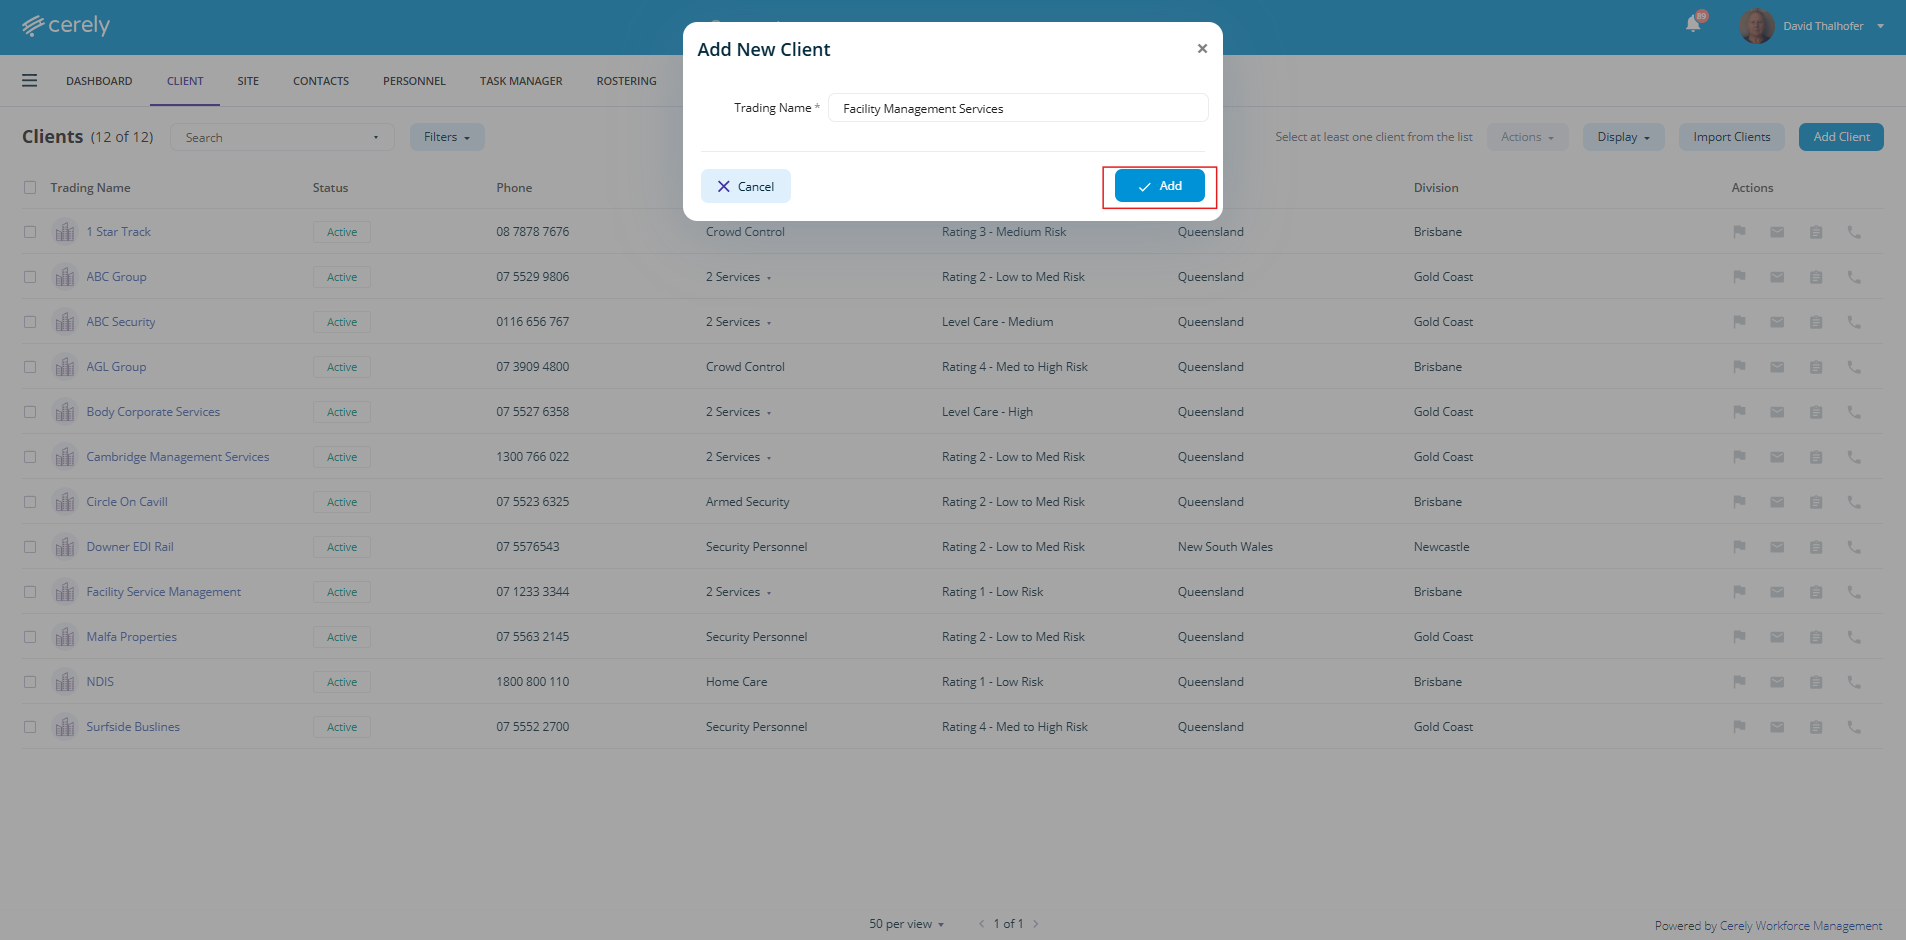
3. Enter the trading name of the new client
Important: This should be the Trading Name, not the Legal Entity Name.
The legal entity (e.g., Pty Ltd name) will be added in the next steps under the ABN/ACN sections.

4. Click on the add button
5. In the pop-up screen enter all *mandatory fields with the client's information
| Field | Description |
|---|---|
| Status | Set to Active to make the client available in the platform |
| Company Name | Enter the client’s full legal entity name |
| Risk Rating | Select a risk rating to identify the client’s service complexity or risk level |
| Phone Number | Enter the main contact number |
| Services | Choose one or more services you provide to the client from the dropdown |
| Fax Number | Enter fax number if applicable |
| State | State where the client’s head office is located |
| Division | Select relevant division(s) the client belongs to |
| Email Address | Enter the primary contact email |
| Sector | Select the business sector the client operates in |
| Website | Client’s website address, if applicable |
| ABN | Enter the client’s valid Australian Business Number (ABN) |
| ACN | Enter the client’s Australian Company Number (ACN), if applicable |
| Primary Manager | Select the primary account manager from your internal team |
| Commencement Date | Date you commenced services with the client |
| Terms of Service (TOS) | Add or link the service agreement document or terms |
| Secondary Manager | Optional – assign a secondary contact for backup support |
| Contract Term | Specify the contract length from commencement (e.g. 6 months, 12 months) |
| Price Review Date | Date for reviewing pricing adjustments |
| Address Information | Include street address, suburb, and postcode of the client’s head office |
| Description | Optional – add internal notes or context for reference |
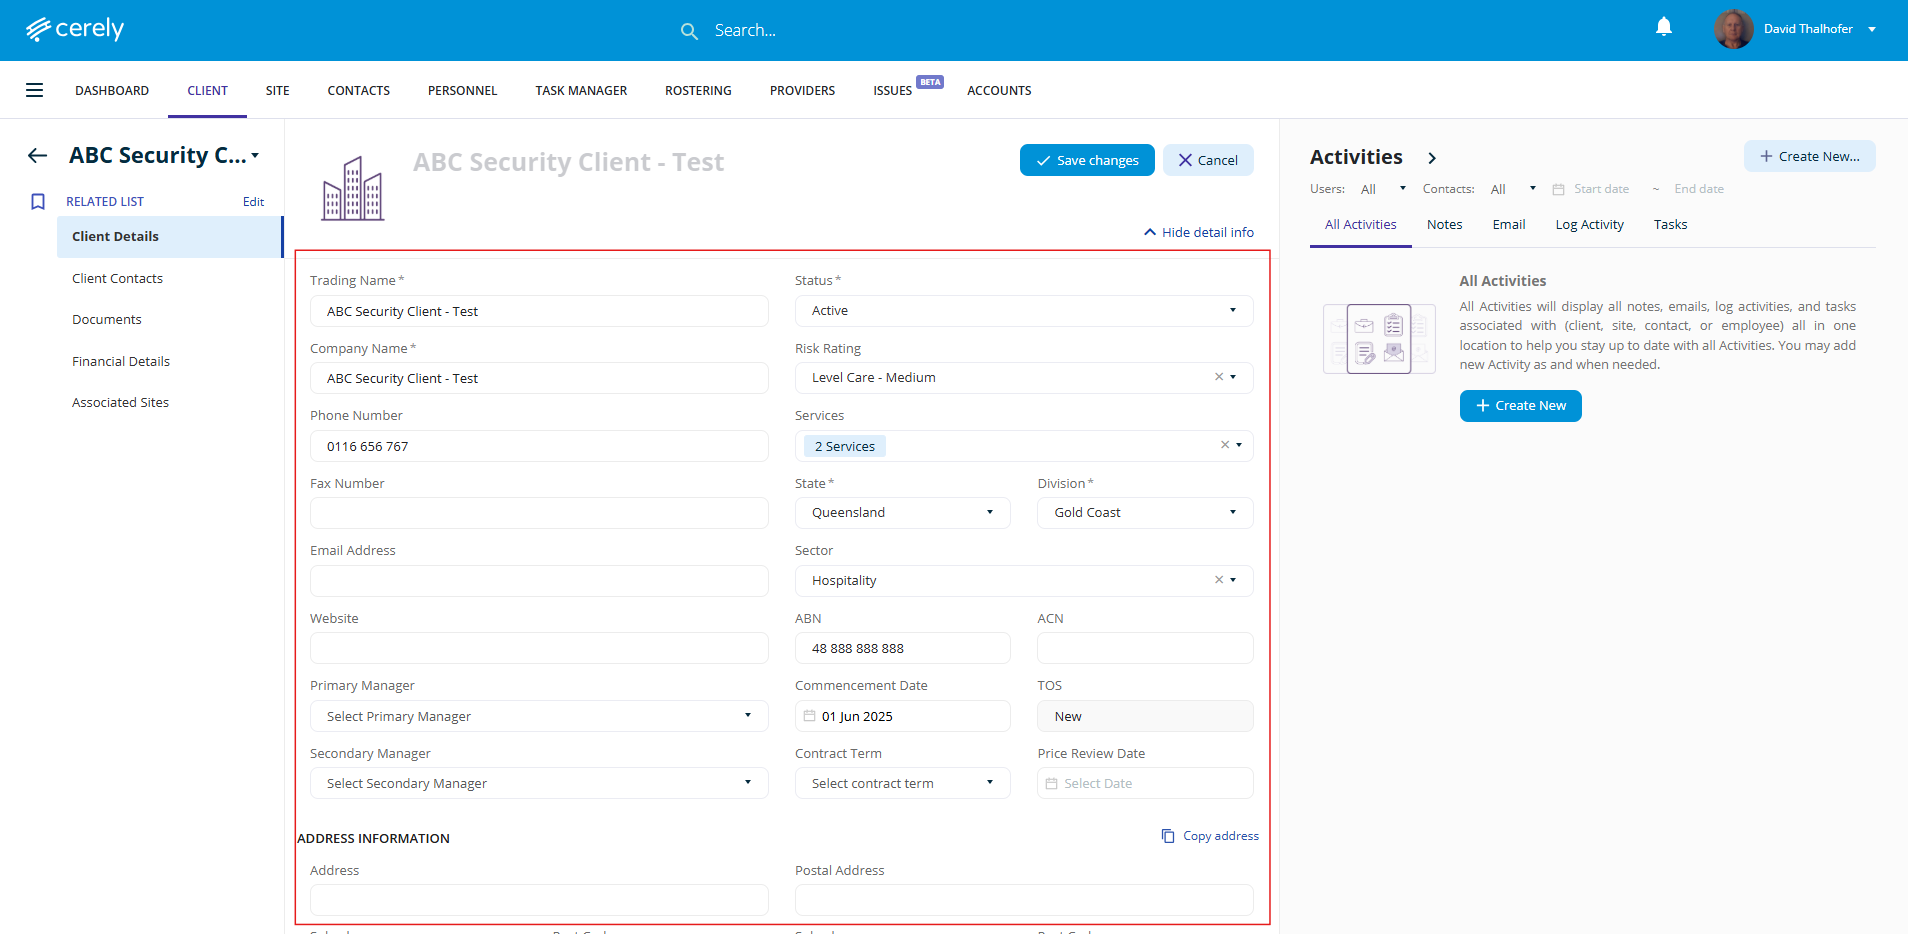
6. Click on the Save Changes button in the top left hand side to save the client records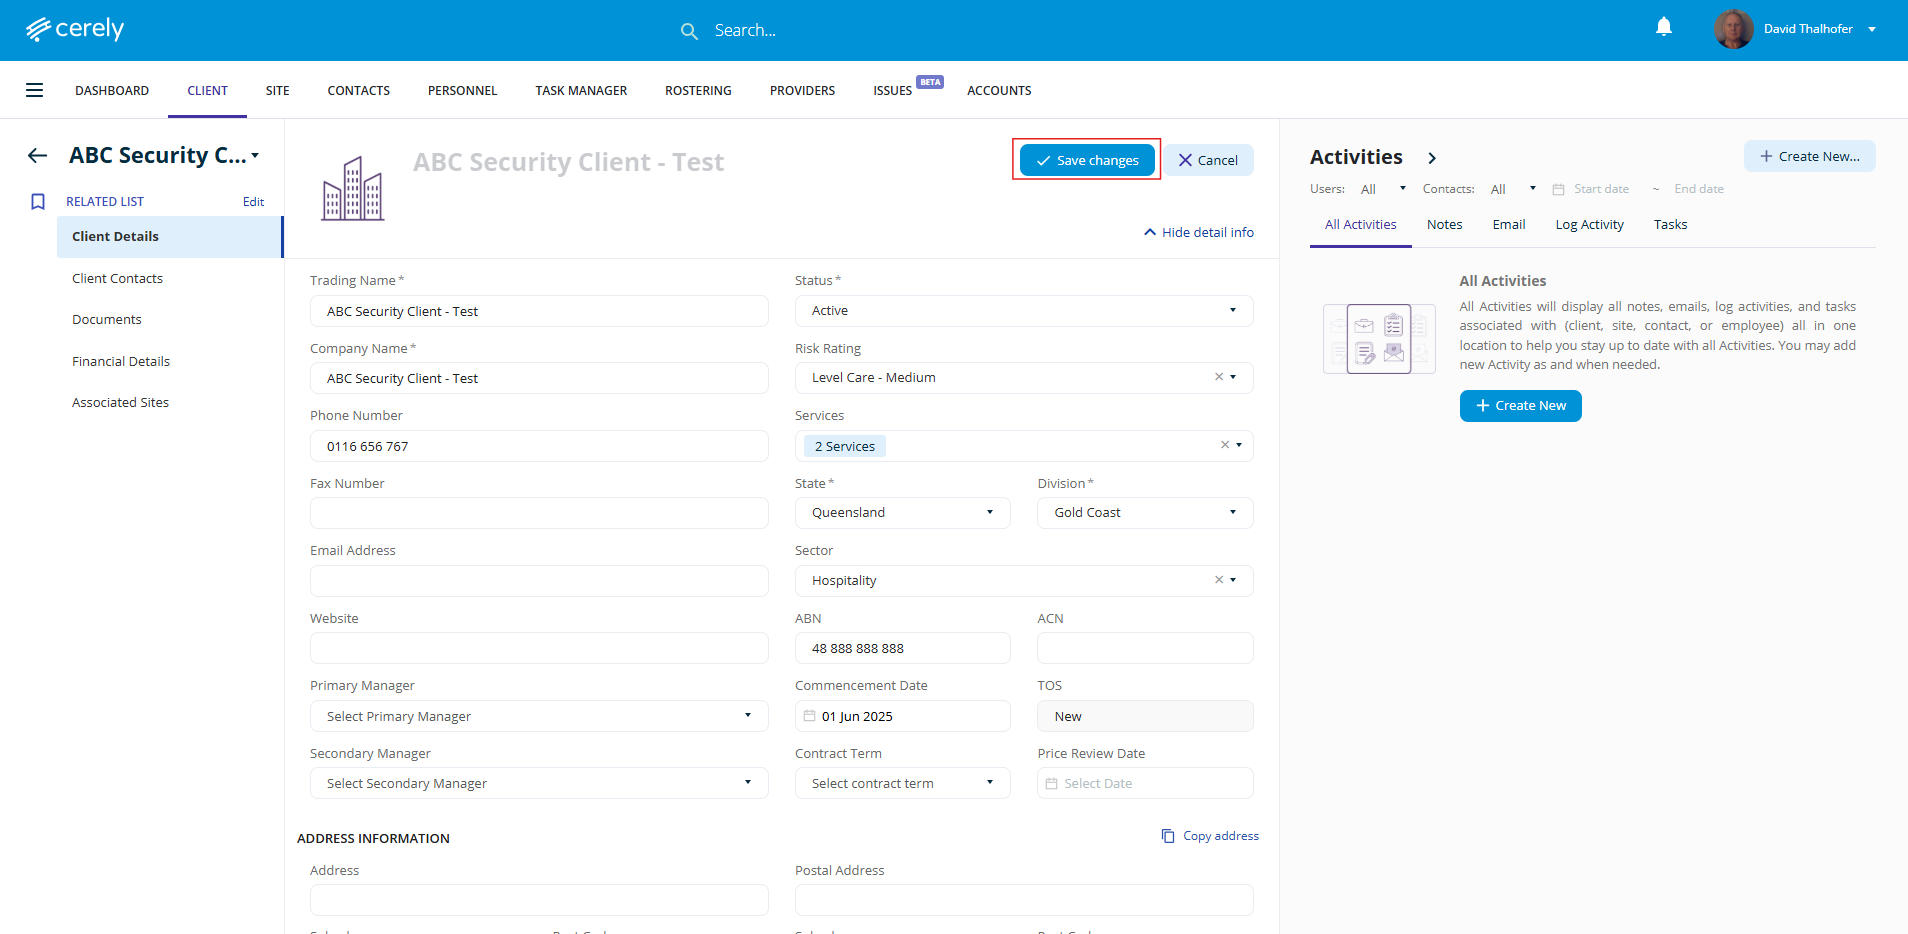
Your new client will now appear in your client list, allowing you to manage their details effectively within the system.